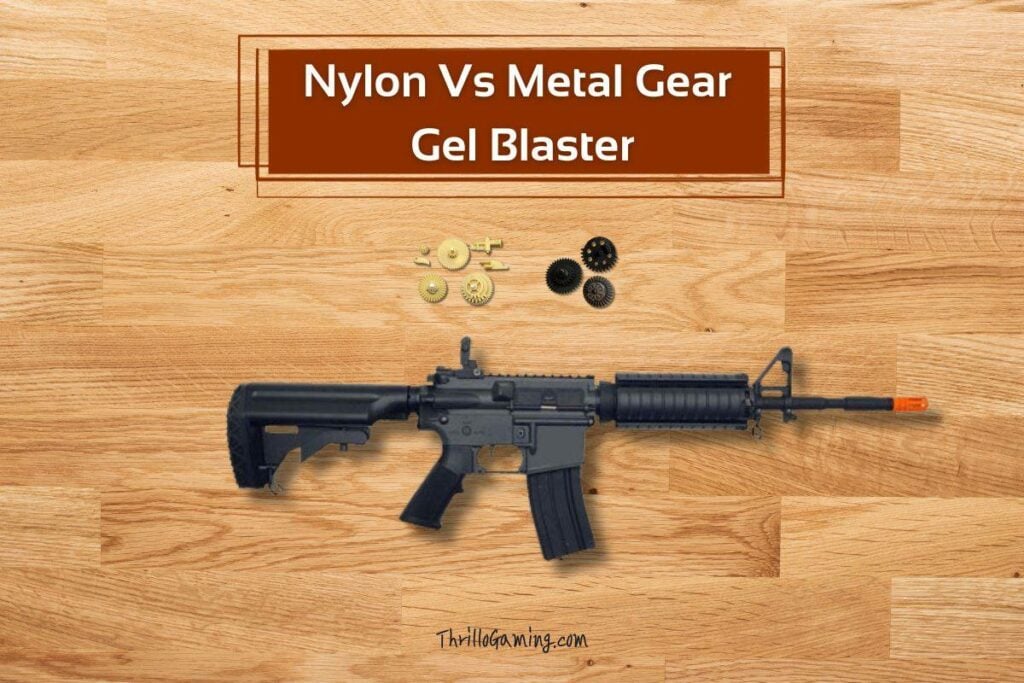
“Do I really need to change the gearbox? I don’t know, man…it sounds too complicated”, Jeremy lamented, holding his gel blaster gun with uncertainty.
“Well, if you’re going ahead with that battery upgrade, you’ll definitely want to consider getting metal gears,” I advised him, “otherwise, those nylon gears will wear out, and one day your gel ball blaster might just stop working in the middle of a game.”
Seriously, folks, if you wish to play with your gel gun by enhancing its performance, modifying the gearbox from nylon to a metal is the best practice. However, it is also necessary to check if it requires you to alter any other components to avoid performance or durability issues.
In this article, I’ll walk you through the differences between nylon and metal gear gel blasters, comparing their respective advantages and disadvantages. I’ll also provide beginner-friendly insights into the gear upgrading process. So, let’s jump right in!

Nylon Gears For Gel Blasters: Are They Good Enough?
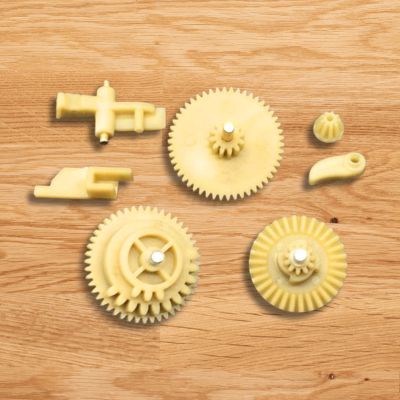
The default configuration for most gel blasters includes nylon gears, which perform well when paired with the original battery, spring, and motor setup. They are a cheaper choice, and if you don’t plan on upgrading to components that specifically require metal gears, sticking with nylon is a practical option.
As you can understand, those gears are absolutely necessary to make the gel blasters work, and nylon gears are optimized for use with 7.4v batteries alongside the stock motor and spring. As long as you avoid making adjustments that introduce more powerful components, which can subject the gearbox to excess wear and tear, you can expect them to maintain their longevity.

But here’s where it gets exciting: if you decide to supercharge your gel gun with modifications, like a more powerful battery, motor, and spring, you’re in for some thrilling action. These enhancements boost your blaster’s power and speed, taking your gameplay to the next level.
However, there’s a catch. All this newfound power also puts strain to your nylon gears, pushing them beyond their usual limits. The result? They might start to show signs of wear and tear sooner than expected. The same rule applies to the nylon piston teeth that interact with the sector gear of a splatter ball gun.
PROS
Nylon gears are more budget-friendly than metal gears.
You likely won’t need to replace them anytime soon unless you make a performance upgrade.
Replacing damaged nylon gears with exactly the same stuff eliminates compatibility issues.
Nylon gears are easier to install and modify if necessary.
CONS
They cannot improve performance of your blaster beyond a limit.
These gears would wear out very fast if used with more powerful components than they are meant to be paired with.
Metal Gear Gel Blaster Guns: Why Are They Popular?
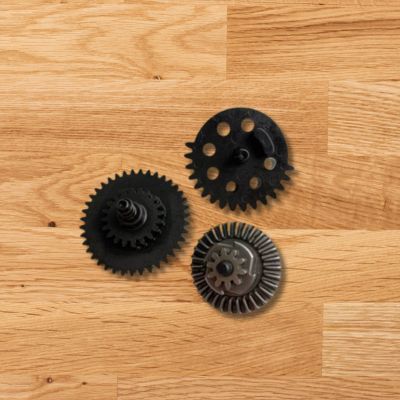
Let’s dive into the world of metal gears – they might not look dramatically different from nylon gears, but boy, are they built to last. Crafted from robust metal, they bring high reliability with enhanced performance, that is not possible with nylon.
In my own adventure, I made the switch to metal gearbox when I modified from the stock 7.4v battery to an 11.1v powerhouse in my M4 gel blaster.
Now, you might wonder, what’s the fuss about metal gears? Well, it’s not only about their strength. The real magic happens when you combine them with other performance-enhancing upgrades.
When you boost your battery and motor, you’re essentially cranking up the firing rate of your gel blaster gun. But here’s the twist: they have to spin faster than ever before. And that’s where metal gears shine. Unlike plastic gears, these metal marvels are up to the task, built to withstand the rigors of high-speed action without wearing out faster.

Likewise, a spring modification is all about ramping up muzzle velocity of your gel ball gun by enhancing compression. But this also means more resistance for the piston, as it wrestles against the teeth to draw back and shoots out gel balls. While such stress would leave nylon gears tattered and worn, metal gears handle it like seasoned pros.
But here’s the crucial part: when you make the switch to metal gears, you’ll want to replace the stock piston with one sporting a metal rack. You see, the performance upgrade alone would already subject the nylon teeth to more wear and tear. When metal meets nylon, it can lead to chipping and gnawing away at the softer material, exacerbating the situation.
There are usually two types of metal gears available for gel blasters- cast and SHS gears. While both are reliable, I prefer the latter as they are made of carbon steel with higher tensile strength and toughness.
So, remember, the choice to go metal isn’t just about brute power; it’s about ensuring your Orbeez gun gearbox stands up to the limits of other components, upgrade after upgrade.
PROS
Thanks to their durability and wear-resistance, metal gears will last much longer than nylon.
Switching to metal gears allows you to upgrade the spring, motor, or battery without wearing out themselves out.
Metal gears make a gel blaster gun more powerful, typically with an increased shooting range.
CONS
Metal gears are more expensive than nylon ones.
Replacing them takes a bit of tinkering, and you may have to make some adjustments if the new piston or the gears don’t fit your splat ball gun properly.
Nylon Vs Metal Gear Gel Blaster Comparison
| Point Of Difference | Nylon Gear | Metal Gear |
|---|---|---|
| Material | Typically made of durable nylon plastic, which is lightweight and resistant to corrosion and rust. | Often constructed with carbon steel components, providing added durability and a realistic feel. |
| Weight | Lightweight, making it easier to handle and carry during gameplay. | Heavier due to the metal parts, which can affect maneuverability but offer a more realistic weight. |
| Durability | Nylon gears are less likely to break or wear out quickly but may still require occasional maintenance. | Metal gearboxes are generally more durable and capable of withstanding heavy use without frequent maintenance. |
| Cost | Typically more affordable than metal gear gel blasters, making them a budget-friendly option. | Often more expensive due to the higher-quality materials used, which can be a significant investment. |
| Realism | May lack the realism of a metal gear blaster in terms of weight and feel. | Offers a more realistic weight and texture, enhancing the overall simulation experience. |
| Maintenance | Nylon gears require less frequent maintenance but may still need occasional lubrication or part replacement. | Metal gears need regular maintenance to prevent rust and ensure smooth operation, including cleaning and lubrication. |
| Performance | May have slightly less consistent performance compared to metal gear gel gun under heavy use. | Generally provides more consistent performance, especially in demanding scenarios. |
| Upgrades | Often compatible with a variety of aftermarket parts and upgrades to enhance performance and aesthetics. | Also compatible with upgrades, but modifications may require more skill due to metal components. |
| Availability | Widely available and offered by various manufacturers, with many options to choose from. | Less common and may have fewer options available due to the specialized nature of metal gear blasters. |
How Can You Upgrade Nylon Gears To Metal In A Blaster?
Switching from nylon gears to their sturdier metal counterparts is a feasible modification for most gel blasters. However, keep in mind that certain gel ball guns, like the Nerf Gelfire Mythic, come equipped with custom gearboxes, which might make the replacement process a tad more challenging.
But fear not, as I’m about to lay out a step-by-step guide to walk you through this transformation:
Step 1: Gather The New Components
To begin the process, start by purchasing a metal gear set of roughly the same size as the stock gears. Additionally, acquire a new piston equipped with metal teeth. Also, don’t overlook the importance of obtaining a metal pinion gear and, optionally, one for the anti-reverse latch.
If needed, disassemble your gel blaster first to examine the original configuration, ensuring you select the correct components for the upgrade. Generally, gears with a teeth ratio ranging from 14:1 to 18:1 are suitable for most Orbeez guns.
Step 2: Disassemble The Blaster
Before you can access the gearbox, it’s essential to disassemble your blaster. Take this step with caution, meticulously noting the placement of all components. Remember that reassembly will be challenging if you forget where each piece belongs.
Step 3: Replace The Pinion Gear
The smaller gear located at the end of the motor shaft is known as the pinion. To remove it, gently insert a large-head screwdriver underneath the gear and apply outward pressure until it pops off.
Next, replace it with the metal pinion gear and securely fasten it in place using the set screw. If desired, you can apply a small amount of loctite to the screw to prevent it from loosening over time.
Step 4: Open Up The Gearbox
With the pinion gear modified, proceed to remove the gearbox of your gel ball blaster cover to expose the internal components. Be sure to take meticulous note of the positioning of each one and shim. Additionally, while you’re in the process, disassemble the piston cylinder and extract the piston.
Step 5: Check For Compatibility
Now, it’s time to verify the compatibility of the new set of gears, piston, and other components. Pay close attention to the crucial interaction between the sector gear and the piston. Position it against the piston rack and rotate it to ensure that the teeth mesh seamlessly. If you find a problem in this step, check out the troubleshooting guide here and find a solution.
Step 6: Make Adjustments (Optional)
You might need to make certain adjustments to ensure the components of your gel gun function smoothly. As an example, when I was upgrading my splat gun, I had to remove the second tooth from my piston rack and add a plastic wrap around the piston to secure it, as it was previously moving loosely.
Step 7: Replace The Parts
When you’re confident that all the new components are compatible and functioning correctly, proceed to install the metal gears in place of the nylon ones, and replace the stock piston with the modified version. While you’re at it, consider replacing the stock anti-reverse latch with a metal one for added durability.
Step 8: Test The Blaster
Now that all the components are properly positioned and functioning, it’s time to test-fire your gel blaster before reassembling it. If your gun offers a full-auto firing mode, switch to it to assess the firing rate, especially if you’ve made changes to the motor or the battery.
Step 8: Assemble The Blaster
If everything functions correctly during the test, you can proceed with reassembling your Orbeez gun and using it in the right way. Ensure that all components are securely tightened, as loose parts can impede performance, potentially jamming your gun or causing damage. For example, failing to snugly secure the motor against the gearbox can significantly reduce the firing rate.
So, that concludes the process of upgrading to metal gears in a gel blaster. For more detailed guidance, you can always refer to this video tailored beginners.
Always ensure that you source your gears, pinion, piston, and other components from reputable and dependable brands. Personally, I found SHS gears to be quite reliable during my modifications. I hope this information proves helpful, and you can now confidently upgrade your gel blaster gun without any complications. Best of luck, and enjoy your enhanced shooting experience!

